Transformers the Movie Trailer


One of the must seen movie this year...great action pack!! check out this latest trailer. directed by micheal bay, and well known executive producer steven speilberg.. don't miss it!

download (trailer 2) 37.3Mb just right click, save target as

3Ds Max Vray Rendering Tutorial - Caustic Effects

This tutorial explains how to set up a scene with Vray caustic effects.

[Rendered without Caustic Enabled]


[Rendered with Caustic Enabled]


As you can see, the difference is very clear. With beautiful caustic effects, the whole scene becomes more vibrant and vivid with extra realism.

Steps to Set Up Caustic for the Scene (Download the scene file at the end of tutorial.)

Step 1: As you can see, the scene is really simple. It has only one Vray light and a simple plane polygon represents the table cloth and a set of tea cup.


First, you need to set up a Vray light. Go to "Create" -> "Lights" -> "VRay" -> "VRayLight". Set the "Color" to light yellow and "Multiplier" to "2.0".

[Vray Light Settings]:


Note: You need to place the Vray light at a good distance from the tea cup object. The direction of caustic photons will be casted according to the position of the Vray. You can experiment with the position to get different effects.

Step 2: Set up table cloth material as the diagram below: (the texture map is included in the scene file.)


Step 3: Set up tea cup material as the diagram below:

Under "Reflection", set "Reflect" to a dark color (R=40, G=40, B=40), the tea cup will have some reflection now. If you set this option to pure white, it means 100% reflection.

Under "Refraction", set "Refract" to white color (R=255, G=255, B=255), it means 100% refraction for tea cup. Set "IOR" (Index of Refraction) to "1.5". It is the IOR for real glass. Set "Fog color" to a light blue color (R=92, G=126, B=212). It will give the tea cup a blue color when rendered. You can experiment with this option whichever way you like. Different fog colors means different colors for the tea cup objects when rendered.


Step 4: Go to "V-Ray: Environment", turn on "GI Environment(skylight) override" and assign a "VRayHDRI" material to the "none" button. Open up the Material Editor and drag the button to a empty material ball, choose "Instance" as selection. Now you can directly control HDRI options inside Material Editor. Choose "kitchen.hdr" as the HDR image for rendering. Set "Multiplier" to "0.4". "Map type" to "Spherical environment" so MAX will unwrap the HDR image. The whole idea is to use VRay light to cast caustic to the tea cup object and use HDR image to provide overall lighting to the scene.


Step 5: Now it is time to set up VRay rendering parameters.

(1) Under "V-Ray: Image sampler(Antialiasing)", set "Image sampler" type to "Adaptive subdivision". Turn on "Antialiasing filter" and set type to "Catmull-Rom". (Note: when you are testing, you can use "Fixed" as "Image sampler" type). Expand "V-Ray: Adaptive subdivision image sampler", set "Min. rate" to "-1" and "Max. rate" to "2".


(2) Under "V-Ray: Indirect Illumination(GI)", turn on "GI caustics", select "Refractive".


(3) Under "V-Ray: Irradiance map", choose "Current preset" to "High".(Note: Select "High" will require a very long rendering time with very smooth result. If you do not have a fast machine, try "Medium" ot "Medium - animation".)

Under "Basic parameters", set "HSph. subdivs" to "15" and "Interp. samples" to "80".

Under "Options", turn on "Show calc. phase" to let VRay show all the steps when rendering so you will know at the early stage whether the rendering is going
fine.

Set the "Mode" type to "Single frame".


(4) Under "V-Ray: Caustics", turn on caustic. Set "Multiplier" to "4.0", "Search dist." to "5.0", "Max photons" to "5000". You need to adjust these values according to the set up of your lights and objects. If you are using the downloaded scene, it is ok to leave them with these values.


(5) Under "V-Ray: System", click on "Lights settings...", in the opened window, select "VRayLight01", set "Caustic subdivs" to "2000", it will give smoothed caustic result.


(6) Under "V-Ray: System", click on "Object settings...", in the opened window, set options as showed in the following diagram.


[Download Scene File:]

The scene file includes: .MAX file for 3dsmax 9.
Download Scene File [226KB].

3DS MAX Basic Lightsaber Video Tutorial

This is really intended for people new to 3DS Max and 3D in general. This tutorial covers Basic Lightsaber Modelling, Basic Keyframe Animation and Using Video Post to add a glow effect to an object.

You may need some basic knowledge and know your way around the program a bit, but I basically show you everything you need to do.
Like I said its really a beginner tutorial.

Download Tutorial (.rar)

Unique Technique for Creating a Face in 3D Studio Max 1.2

This tutorial will take you through a unique technique for creating a face in 3D Studio Max 1.2 (NOT NURBS). You can also use this as a reference for 3D Studio.


I shall only create half of the face to make teaching process a bit simpler.
To start with it is best to sketch a left profile of the face and use it as a background image. But it is not really necessary.

So lets start with the real stuff now:
First, create different cross-sections of the face as in the picture here:


Remember that all the splines should have the same number of vertices and in the process following, the 1st vertex of a spline would join with the first vertex of other splines. So we can control the horizontal shape of the face with the placement of vertices on the splines, at this stage only.

Next, create an arc - 180 degrees (half the circle). This will be used as a path to loft the above shapes on.

This is as follows:

Select the arc, and click on the "loft object " in the create tab


and then on the loft button.

Now click on the get shape button and then click on the first spline (anywhere). This would place the spline on the arc and loft it along. It would be a good option to keep the perspective viewport in "smooths and highlights " shaded mode.You would see the lofted object in 3d.

Now change the path percentage to 5% (highlighted with yellow - also check the percentage option next to it)


then again click on the get shape button and click on the second spline. Immediately you should see the impact in the perspective viewport. Here we are just specifying different shapes at different levels of the path, and the s/w would connect them all (1st vertex to first, 2nd to 2nd etc).

Repeat the same, changing path percentages, for all the shapes.

This is how my lofting looked.


Horrible!! I won't pull all the vertices and put them in the right position. Well you don't have to in order to fix it.

DO NOT check the skin checkbox in the skin parameter drop down. This will keep our mesh visually simpler and easy to work on further. Just leave the skin in shaded checked (which is the default) so that the perspective shows the 3d object.

Now comes the true power of the software.

Select the lofted object and click on the modifier tab


The same settings as we had for lofting appear here.

( We can play a little with the path steps in "surface parameters" to get a smooth shape with the least path steps - and have a lower poly count).

Click on the sub object and select shape option. Now we can select any spline we lofted and "edit spline it". This way you can edit the spline in 3D. Above that the s/w will show the impact on the 3d model in real time. This is the reason I suggested that skin checkbox should not be checked as now we can edit the spline very comfortably.

We can also keep a mirror "instance" of this object next to it to make a complete face and as we edit the spline of one , the effect is mirrored on the other as well and we can see the final complete face.

We can also add another spline at another level on the path.

To give a more organic look (in case of aliens, animals especially) we can make further use of a displacement map. Just pick any bmp with good number of shades and texture, and use it as a displace map.

So here's what I achieved in 3D Studio Rel 4.0 (not MAX) from this technique.


As you can see this gives a little less flexibility then NURBS but is much simpler.

Video Tutorial for 3d Max Beginners....

Anyone who is a little familiar with 3d max, u can extrude, import, restart, all that,its pointless watchin unless u'd like to kno how to cut the faces of a poly w/o slicin, o and for more beginners, to rotate its alt+left clik, zoom, alt+right clik, and to select more than 1 face/poly hold ctrl and either drag or clik to selct individual pieces....

3D Studio MAX Hotkeys and Mouse Essentials

When you start out with 3D Studio MAX you will likely start with trying out different tools and features and the basics. Something that should be included in those basics, but is often left out, is using hotkeys. As you already know, or will certainly find out soon, creating 3D art is a time-consuming activity. Using hotkeys and the mouse efficiently can save you tons of time. At first you may need to spend some time looking up the hotkey (see printer-friendly version of this tutorial here), but once you memorize them through using them, they will allow you to produce results at least twice as fast. When you modeling for example (moving, scaling, rotating, etc.), with one hand on the mouse, you will have your other hand free to press one of the hotkeys.

Let’s start with several of the main hotkeys you just can’t ignore:

We are going to start with modeling a single link from the chain. Click the Shapes button on the Command Panel, click the Rectangle button, and then draw a rectangle as shown in the picture below. Don’t worry about the exact size yet.

F1 – Opens 3D Max Reference (Help)
Depending on the feature you are currently working with, it may take you directly to the main help page regarding that feature.

F2 – Shade selected faces toggle
When you are in polygon sub-object level and select one or more polygons, they will be shaded entirely (red) by default, like this:
When you press the F2 key you can toggle between the default setting and having only the edges turn red for select faces/polygons, as shown below. This can be very useful when you have complex models.

F3– Toggle between Wireframe and Smooth + Highlights
By default, a viewport in 3D Studio MAX will show objects as wireframes. Instead of right-clicking the viewport and choosing Smooth + Highlights to show the shaded object, you can simply press the F3 key to set a viewport to Smooth + Highlights as shown below, or back to Wireframe.

F4 – View Edged Faces
As you can see in the picture above, when you switch to Smooth + Highlights, 3D Studio MAX will not show the edges of the faces. By pressing the F4 key, you can have the object display the edges of all faces, regardless of whether they are selected:


The following two are usually the first two keys I press when starting with a default empty scene:

G – Hide/Show Grid
Unless you actually need the grid (e.g. to snap to), it can get in the way. The G key allows you to hide or show it.

J – Show Selection Bracket Toggle
The reason for using this key is similar to using the G key. By default, 3D Studio MAX shows a selection bracket around each select object (unless the viewport is in Wireframe mode). This can become very annoying, but can easily be removed by pressing the J key.


The following four keys are amongst the first I suggest you start using:

Q – Select
Enables the Select tool:

W – Select and Move
Enables the Select and Move tool:

E – Select and Rotate
Enables the Select and Rotate tool:

R – Select and Scale
Enables the Select and Scale tool:

H – Select by Name
Opens the Select by name dialog. This dialog shows a list with all visible objects in the scene. When you need to attach or link objects for example, and there are many objects in the scene, selecting by name can make things a lot easier.

CTRL-A – Select all

CTRL-D – Deselect all

Spacebar – Selection Lock toggle
This key can be useful sometimes, but annoying more often. When you try to select a certain object and a different object remains selected, press the Spacebar key because you probably already hit it by accident and ‘locked your selection’.

1 to 5 – Sub-object level X
This is another good example of a real timesaver. Instead of using the mouse button to select a sub-object level of an Editable Poly for example, you can press one of the following keys.

1 - Vertex

2 - Edge

3 - Border

4 - Polygon

5 - Element

These allows you to quickly change between the sub-object levels, e.g. move a vertex, than scale a polygons, chamfer a line, etc.

7 – Polygon counter
The 7 key allows you to display a polygon counter in the upper left of the upper left viewport:


8 – Open Environment and Effects Dialog

Viewport Hotkeys

F – Switch to the Front viewport

T – Switch to the Top viewport

L – Switch to the Left viewport

R – Switch to the Right viewport

P – Switch to the Perspective viewport

B – Switch to the Bottom viewport

C – Switch to a Camera viewport

CTRL-C – Create camera from viewport
Creates a new Camera, work only on Perspective viewports.

V – Open view shortcut menu
Allows you to pick a view from a list (using another key again of course). For example, press the V key and then the K key for Bac k view.

Z – Zooms in on the current selection

CTRL-X – Toggle Expert mode
Removes command panels, toolbars, etc. and leaves you only with viewports. Don’t even think about using this unless you know your hotkeys. ;)

ALT-Q – Isolate Object
Isolates the object you selected and hides all others. This is a great feature for when you work with a scene or object consisting of many individual objects. Unfortunately, it does not work for sub-object selections such as a group of polygons. If you got used to hiding and unhiding objects, this option will definitely save you a lot of time.

O – Adaptive Degradation Toggle
Shows objects as boxes while moving, rotating, zooming on viewport to increase viewport performance. I hardly ever use this one, but it’s one of those darn keys you may hit by accident and wonder what the heck is going on with your objects.

X – Transform Gizmo Toggle
Another good example of a key you may hit by accident and wonder why you cannot move, scale, rotate, etc. anymore. Pressing X will change the gizmo from

to:

D – Disables the viewport
Although this one can be useful, it is also one I occasionally press by accident. Press the D key again to disable/enable the viewport.


Shift-Z / Shift-Y – Undo /Redo viewport operation
Undo operations such as switching to a different view, rotating, zooming or moving through viewport.

+ and - – Increase/decrease Gizmo size

The following are three rendering related hotkeys I used the most:

F9 – Render last rendered viewport, or, in case of the first render, render selected viewport.

Shift-Q – Quick render, renders selected viewport.

F10 – Opens the Render Scene window allowing you to set rendering options.

M – Opens the Material Editor CTRL-V – Clone object
Although holding down the Shift key and moving, rotating, or scaling an object also allows you to create a clone, by using CTRL-V you can create a clone on the exact same location and of the same size as the original.

Alt-X – Display As See-Through Toggle
By pressing the ALT-X keys you can display an object as see-through, partly transparent. This is useful for when you need to see the model sheet/reference/blueprint or other models/geometry through it.


The following three are useful for while working with an Editable Poly:

Alt-L – Select Edge Loop
This is the same as pressing the Loop button in the Editable Poly section when you are in Edge sub-object level.

ALT-C – Cut
Enables the Cut tool, which you can use to draw edges on polygons.

SHIFT -E / ALT-E – Extrude poly
Enable the Extrude tool.

The hotkeys mentioned in this tutorial are just a small subset of the available hotkeys in 3D Studio MAX. And additional or different hotkeys can be available depending on what features you are using. If you search for Default Keyboard Shortcuts in the 3D Studio MAX user reference, you should be able to find a complete overview.

In addition to the default keyboard shortcuts, you can use the following procedure to create a custom keyboard shortcut:

* Choose Customize menu > Customize User Interface > Keyboard panel.
* Use the Group and Category lists to find the action for which you want to create a shortcut.
* Click action in the Action list to highlight it.
* In the Hotkey field, enter the keyboard shortcut you want to assign to the action.
* Click Assign.

Using the Mouse Efficiently

Just as important as using hotkeys is for working efficiently, using the mouse properly can be a huge timesaver as well. Using the primary mouse button frequently (that’s the left button for the most of us) is mandatory when you use 3D Studio MAX but the others (middle, and right for example) are just as useful.

Let’s start with the secondary mouse button (usually the right-mouse button). The most common purpose of this button is opening the shortcut menu. For example, if you right click on the name of the viewport (e.g. Front, Left, and Perspective) a popup menu appears allowing you to perform several tasks related to the viewport. For many of these options, you should use hotkeys such as mentioned above, but for other options, such as the Properties of the viewports, it’s still an useful menu. More useful though, is the main shortcut menu that opens when you right-click on the viewport:

Some of the options on this menu I use frequently are:

* Unhide/Hide selected/unselected, by name, all
* Convert to Face/Vertex/Edge - This converts, for example, a selection of vertexes to a selection of edges. It does not actually change the geometry of your model; it merely changes the sub-object level and remembers the selection.
* Save and manage Scene States (very useful!)

Another common task for the right mouse button is to open the shortcut menu of a selected object, e.g. to manage its Properties.

Some less common use of the right-mouse button:

* Right-click the Undo or Redo to see and select a list of undo/redo actions.
* Right-click a spinner to reset it to zero.
* Right-click a color or map slot to cut/clear/copy/paste it.

The middle mouse button I use more often than the right mouse button, especially during the modeling process, and saves me a huge amount of time. The following are the most common tasks I perform with the middle mouse button:

* Hold it to drag/move through viewport. This saves time because you don’t have to switch your current tool to the Pan View tool (little hand) at the right bottom of the interface and switch it back to the tool you were using.
* Hold it while also holding the ALT key to rotate the viewport, this saves time because you don’t have to switch your current tool to the Arc Rotate tool at the right bottom of the interface (which you could do with CTRL-R if you don’t have a middle mouse button).
* Since my middle button is also a scroll wheel, I use it to zoom in and out on the viewport. If you hold the ALT key, you can zoom in more gradually.

If you merely read this article/tutorial, I suggest reading it again and trying the different hotkeys and mouse operation. It will change the way you work with 3D Studio Max and you will be able to produce a lot more results in the same amount of time. Below is a link to a printer-friendly PDF version of this tutorial. Have fun!

Claymation


Clay animation is one of many forms of stop motion animation; specifically, it is the form where each animated piece, either character or background, is "deformable", i.e. a malleable substance, usually plasticine clay.

The term "Claymation" is also used to describe clay animation. Though a registered trademark created by Will Vinton in 1978 to describe his clay animated films, the portmanteau claymation has entered the English language as a common term, called a genericized trademark.

All animation is produced in a similar fashion, whether done through traditional cel animation, stop-motion, or CGI. Each frame, or still picture, is recorded on film or digital media and then played back in rapid succession. When played back at a frame rate greater than 10-12 frames per second, a fairly convincing illusion of continuous motion is achieved.

Transformers - Stop Motion Animation


"transformers" - using stop motion animation, one of the animation technique.

History of Animation - Before Disney


A forerunner of today's comic strip can be found in an Egyptian wall decoration circa 2000 B.C. In successive panels it depicts the actions of two wrestlers in a variety of holds. In one of Leonardo da Vinci's most famous illustrations, he shows how the limbs would look in various positions. Giotto's angels seem to take flight in their repetitive motions. The Japanese used scrolls to tell continuous stories.

Since the beginnings of time, human beings have tried to capture a sense of motion in their art. From the eight-legged boar in the Altamira caves of Northern Spain to paintings alongside the remains of long-dead pharoahs, this quest for capturing motion has been a common theme throughout many of mankind's artistic endeavors.

True animation cannot be achieved without first understanding a fundamental principle of the human eye: the persistance of vison. This was first demonstrated in 1828 by Frenchman, Paul Roget, who invented the t
haumatrope (left, click to stop). It was a disc with a string or peg attahced to both sides. One side of the disc showed a bird, the other an empty cage. When the disc was twirled, the bird appeared in the cage. This proved that the eye retains images when it is exposed to a series of pictures, one at a time.

Two other
inventions helped to further the cause of animation. The phenakistoscope, invented by Joseph Plateau in 1826, was a circular card with slits around the edge. The viewer held the card up to a mirror and peered through the slits as the card whirled. Through a series of drawings around the circumference of the card, the viewer saw a progression of images resulting in a moving object. The same technique applied to the zeotrope. In 1860, Pierre Desvignes, inserted a strip of paper containing drawings on the inside of a drumlike cylinder. The drum twirled on a spindle, and the viewer gazed through slots ot the top of the drum. The figures on the inside magically came to life, endlessly looping in an acrobatic feat.

The development of the motion camera and projector by Thomas A. Edison and others provided the first real practical means of making animation. Even still, the animation was done in the simplest of means. Stuart Blackton, issued a short film in 1906 entitled Humourous Phases of Funny Faces where he drew comical faces on a blackboard, photographed them, and the erased it to draw another stage of the facial expression. This "stop-motion" effect astonished audiences by making drawings comes to life.

In the early twenties, the popularity of the animated cartoon was on the decline, and movie exhibitors were looking elswhere for alternative entertainment media. The public was tired of the old formula of stringing sight gags together without including a story line or any character development. What the art of animation could accomplish was not yet evident in this period, except for in the works of Winsor McCay such as Gertie the Dinosaur, 1914. Mccay's major accomplishment was the fact that he had developed a character in his dinosaur, something that had previously only been seen in Otto Messmer's, Felix the Cat. McCay's piece had a galvanizing effect on audiences. The notion of a dinosaur coming to life on the screen was astonishing. Of all the early animations, Felix the Cat developed the strongest screen personality, but failed to develop any further, relying on crude visual tricks to entertain the audience as opposed to developing a stronger screen persona.

the strokes - is this it


The Strokes are an American rock band formed in 1998 that rose to fame in the early 2000s as a leading group in the garage rock revival. Upon the release of their acclaimed debut album Is This It in 2001, many critics hyped the group as the "saviors of rock" for their stripped down sound, heavily influenced by bands such as The Velvet Underground. Since then, the band has maintained a large fan base and has enjoyed much success, particularly in the United Kingdom.

movie terbaik 2007 (MTV movie award)

"Transformers"-bakal pecah panggung
Best Movie
Pirates of the Caribbean: Dead Man's Chest

Best Performance
Johnny Depp - Pirates of the Caribbean: Dead Man's Chest

Best Summer Movie You Haven't Seen Yet
TRANSFORMERS

Best Movie Spoof
Andy Signore - United 300

MTV Generation Award
Mike Myers

Best Comedic Performance
Sacha Baron Cohen - Borat: Cultural Learnings of America for Make Benefit

Breakthrough Performance
Jayden Smith - The Pursuit of Happyness

Best Kiss
Will Ferrell & Sacha Baron Cohen - Talladega Nights: The Ballad of Ricky Bobby

Best Fight
Gerard Butler vs. "The Uber Immortal" - 300

Best Villain
Jack Nicholson - The Departed

mtvU Student Filmmaker
Josh Greenbaum (University of Southern California) - Border Patrol

handset simple......nokia 6030.....


N-gage tinggal kenangan......kali ni aku bersama ngan nokia 6030 yg nampak lebih simple, kecik pastu dengan keypad yg besar.....sesuai untuk org2 yg simple cam haku.........ade radio, boleh mesej, boleh call, ade GPRS.....dah cukup...bak kater tok wan...rege pun murah,kire berpatutan la...aku beli pun RM225 je first hand kat kedai simpang empat parit raja nun. ni komen serba sikit oleh pengguna2.....

Faken:
I have had this phone since winter 2005. It's a very reliable phone. Dropped it at least 50 times on cement, down 15 flights of stairs, and other places. This phone is worth every penny.

Usman:
i m usimg it from this phone is asome for call mesages & for genrela use best phone of low price. weldone nokia i m waiting for special one by nokia 6500 classic.

Nokia Modders:
I recently modded my nokia 6030, installing a camera, yes. A camera. It works perfectly, taking about 5 minutes of video and 1.3 Megapixel photos. E-mail me @ rd12i@yahoo.com for pics and details on how to get yourself one.

program khidmat masyarakat kelantan

6 - 9 jun yg lalu aku dengan 58 student uthm join program khidmat masyarakat kat kelantan...memang best giler.......kitorang bertolak dari uthm kul 5 petang la lebih kurang....aku ngan deannie duk satu bangku bas tengok spiderman 3 kat laptop aku sampai tertido....memang penat, penat duk atas bangku je....

Rabu, 6.39 am, 6 jun 2007:

Kitorang sampai kota bharu tepat kul 6.39 pagi...smayang subuh jap pastu bertolak gi asrama sekolah mulong, just utk siap2 mandi je........pas breakfast beramai2 kat gerai tepi jalan tue, event seterusnya kitorang bertolak ke sekolah menengah kebangsaan kota, (skolah lama paan)....sampai2 je aku kene handle sikit sesi taklimat LDK kumpulan 3 ngan fesi2 yg terlibat....

Rabu, 3.00 pm, 6 jun 2007:

Tepat kul 3 petang sesi penyerahan anak angkat kat dewan kota jelasin, smk kota...aku ngan deannie ditempatkan dalam satu family en. mas kuri....memang sporting abis family nie....hehehe....dengan adanya afiq, aie, nabila, tasya pastu ngan kimi memang xleh handle........deannie cukup cuak kalo speaking ngan kimi pasal xde subtitle...(sabah ngan kelantan jauh beza tuh)....ngan yg lain ok lagi sebab diorang dah duduk kl 23 tahun sblum nie.....aku ok je pasal darah orang kelate tu still ade dlm antibodi nie...pendek citer mak aku memang asal org kelantan la.....

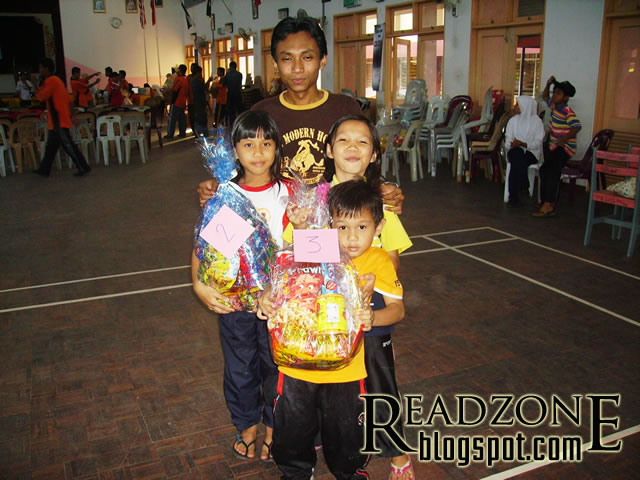
Rabu, 5.00 pm, 6 jun 2007:
Aktiviti bebas bersama keluarga angkat.huhu....aku, deannie ngan family angkat angkat yg lain bertolak ke rumah masing2....
Related Posts with Thumbnails
 

Usage Rights

DesignBlog BloggerTheme comes under a Creative Commons License.This template is free of charge to create a personal blog.You can make changes to the templates to suit your needs.But You must keep the footer links Intact.